Offbeat Bikes Magazine
 January 2018
Offbeat Bikes Magazine Hidden Horrors Article
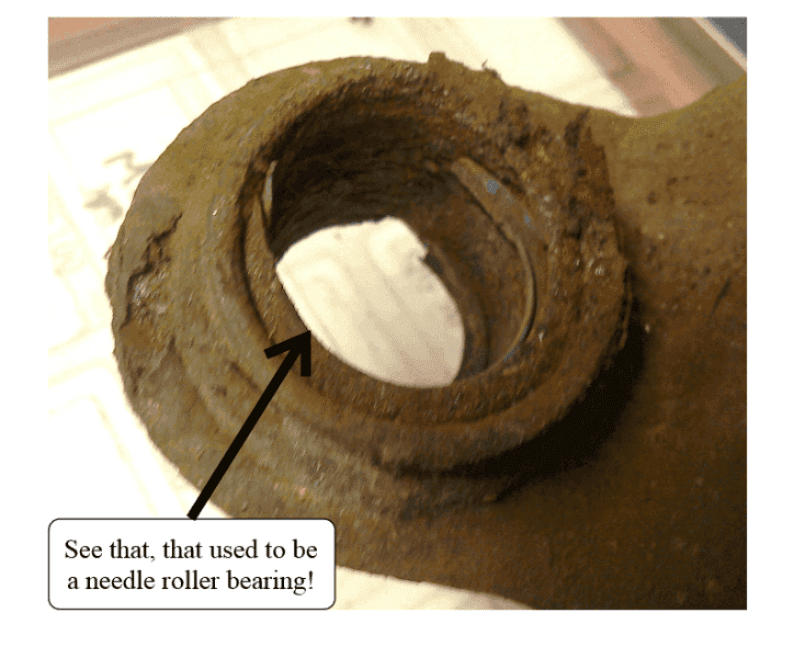
 Just like most of an iceberg is hidden from view beneath the water, you can usually guarantee that for every fault you find when viewing a prospective bike purchase, there are some more lurking unnoticed, only to be fully revealed in all their glory when you start to work on it. Here’s my favourite one that I found on a GS500 suspension linkage. (And it had a valid MOT certificate!)
Worn GS500 rear suspension linkage
Ducati Scramblers, Old and New
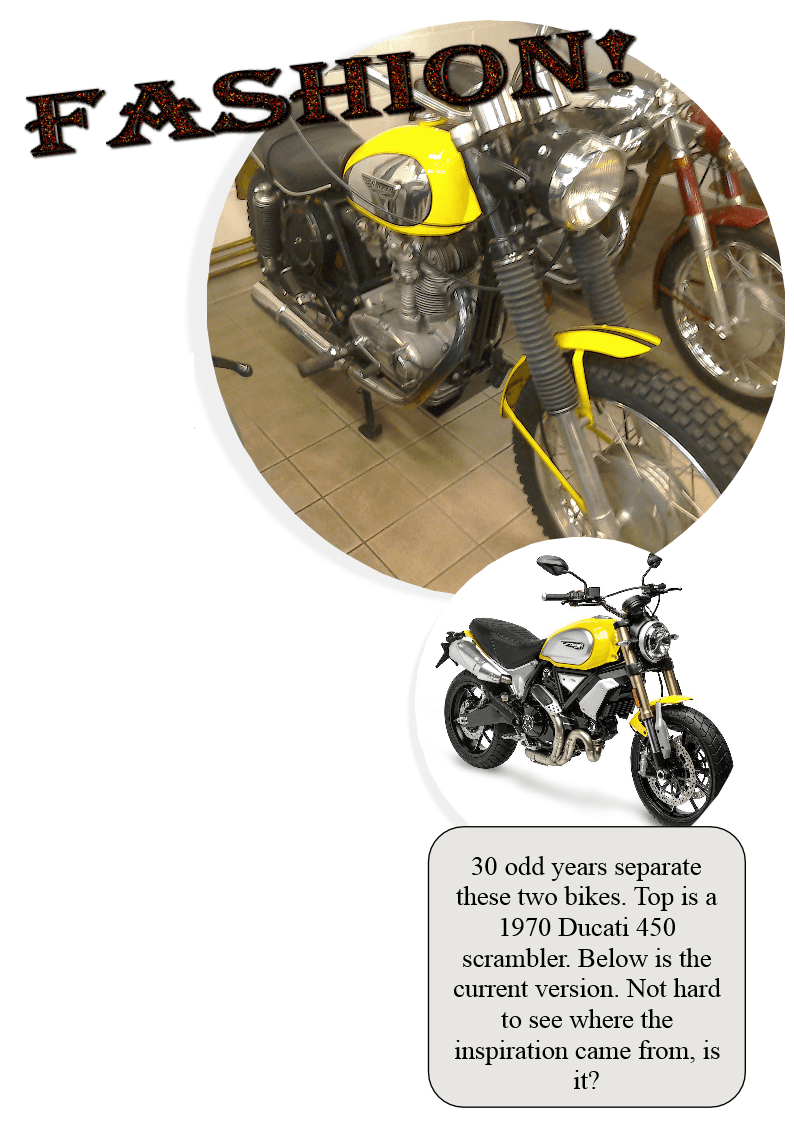
  OK, when I read (or hear) the word fashion, I automatically come over all David Bowie. (Look it up younger readers.) But enough singing, lets talk about motorcycle fashion. Just as with clothes, it seems that motorcycle fashion is cyclical. Take a quick glance at the bike (left or above if you're on a mobile) and you could be forgiven for thinking that it’s one of those ‘new’ Ducati scramblers. But just to prove that Ducati aren’t absolute beginners when it comes to scramblers, this one is actually a 1970 vintage Ducati 450 single. It’s not hard to see where their inspiration came from for their new model, although there are, of course, changes.
  Ducati (like many Italian motorcycle manufacturers) has experienced fluctuating fortunes. It’s difficult to say which period was their golden years, but despite the 916 assisting Carl Fogarty’s rise to fame, it was the humble Monster that was the saviour of the modern Ducati factory and finally had their financial backers shouting, “let’s dance!” No matter which era of Ducati is your favourite, they are always a treat both in sound and vision and the new scrambler is certainly a hit with all the young dudes!
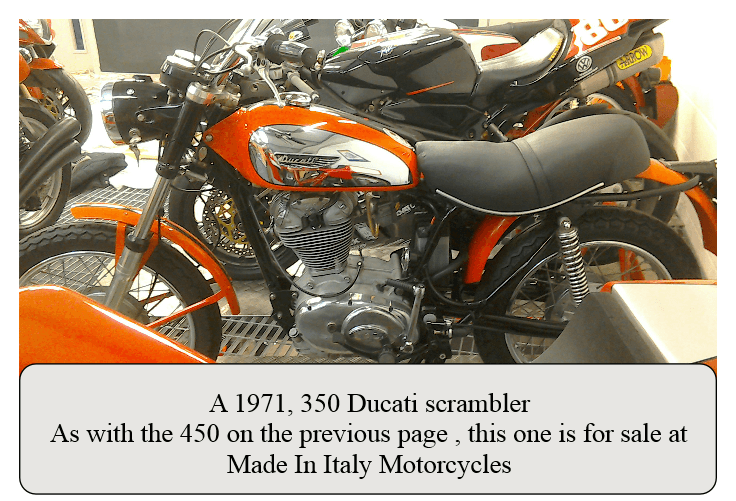

1971 Ducati 350 Scrambler
Offbeat Bikes Magazine Fight Club Article
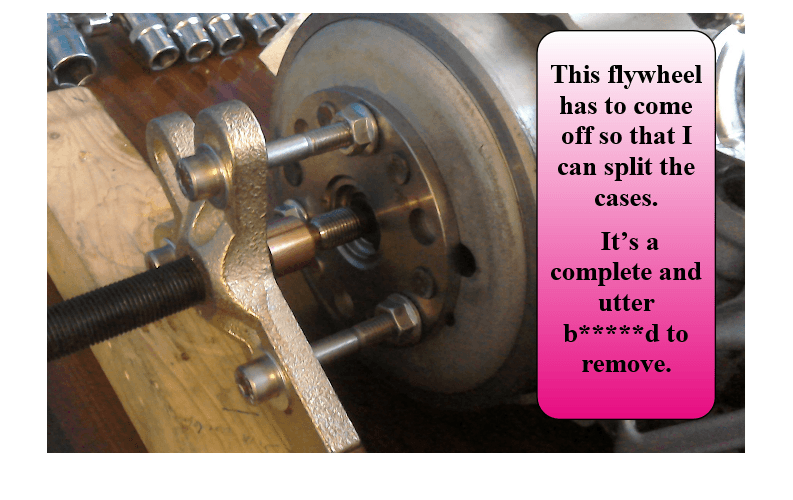
   I know I’ve put it off for far too long. But, it has to happen now. I have to rebuild the bottom end on the trials bike. This means that I have to remove the flywheel. I’ve been here before. It’s a struggle. I know that it’s time for Fight Club!
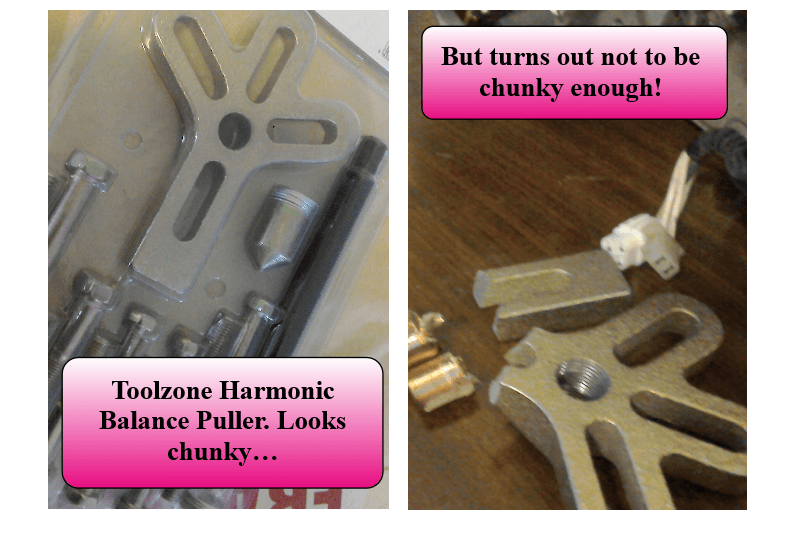
   Yamaha specify a special tool for this job at a cost of £160! Previously I’d used a homemade one, but that was 12 years ago and I couldn’t find it. After an internet search for something suitable (and cheap) I thought that a harmonic balancer puller might be re-purposed to do the job. Now if you look on your favourite internet sites, you’ll see loads of these; lots of which look exactly the same, with very similar packaging, but with very different price tags. Being a cheapskate (and knowing that it may be another 12 years before I need it again) I chose a cheap, Toolzone branded version, for the huge sum of £5.52 delivered. (I don’t know if this was a pricing mistake, but the seller has recently increased the price.) It looked chunky enough, and having found some suitable M8 bolts to use with it (bolts in the set are all UNC/UNF threads) I fitted it up and started cranking on the centre bolt. Now, I’m always a bit nervous at this point because you’re leaning pretty heavily on the tools, and when the flywheel loosens, it does so suddenly and usually results with me smacking my knuckles on something hard! Not to worry this time though, because the main body of the puller gave way before the flywheel. 
Pulling SY250 rotor
   Time then for a rethink, which resulted in every cupboard, shelf or box in the garage being raided in search of the homemade puller. Finally, after hours of searching, the puller was located. Thankfully, this one did the job and with a healthy crack, the flywheel parted company from its taper. And, as a bonus, it did it without damage to either engine or my hands. A win for me!
    Now, it’s easy to say that the Toolzone puller was just cheap sh*t, but it was under serious strain when it gave way. Under more normal use, it may work just fine. Next up will be to see if the £18 bearing separator set that I purchased manages to pull the main bearing off the crank…
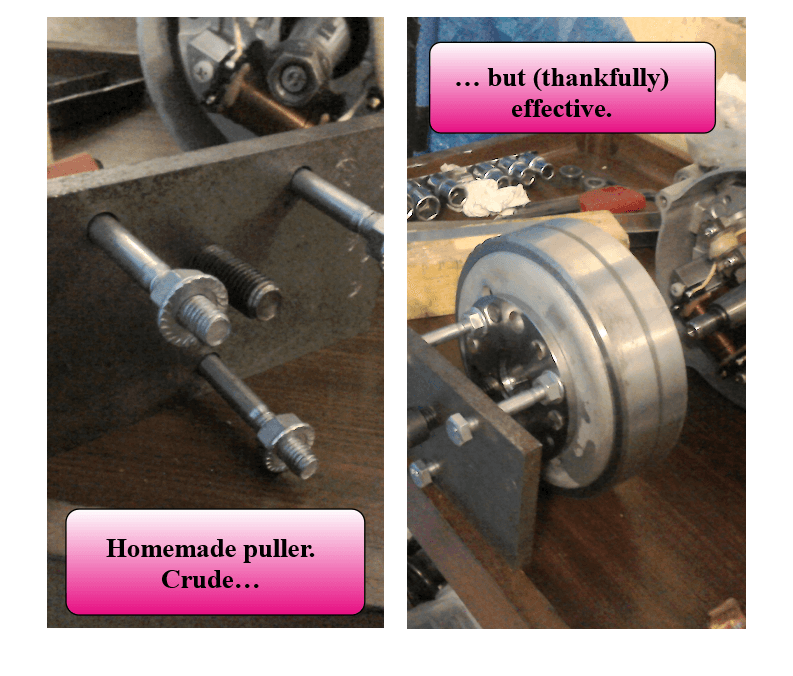
Homemade motorcycle rotor / flywheel puller
Harmonic Balancer Puller
Offbeat Bikes Magazine 3D Printing Article

 This Christmas, I managed to persuade my son that what he really wanted was a 3D printer. He’s into military history and recreating famous battles while playing miniature wargames. (Miniature wargames are basically posh boardgames, with tiny soldiers, tanks, vehicles etc. rather than boring old plastic counters.) He was sold when I showed him some of the models that other people had printed. It barely crossed my mind that it might possibly be of some use for the shed projects…
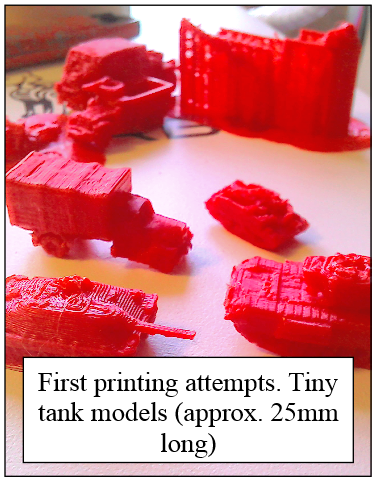
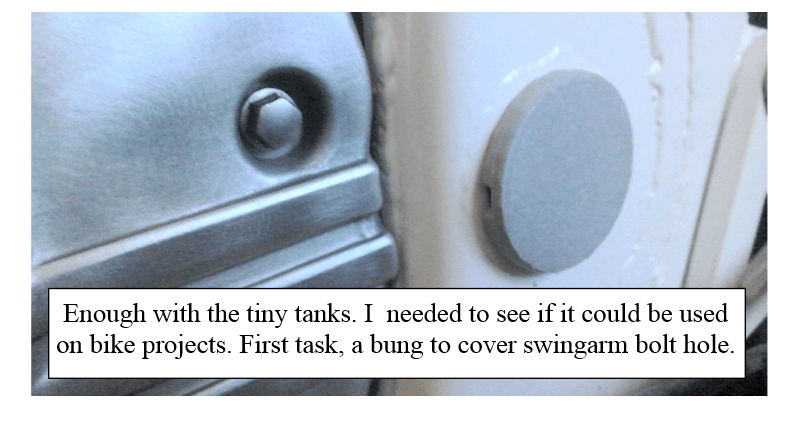
First attempts at 3D printing
3D printed swing arm bolt cover.
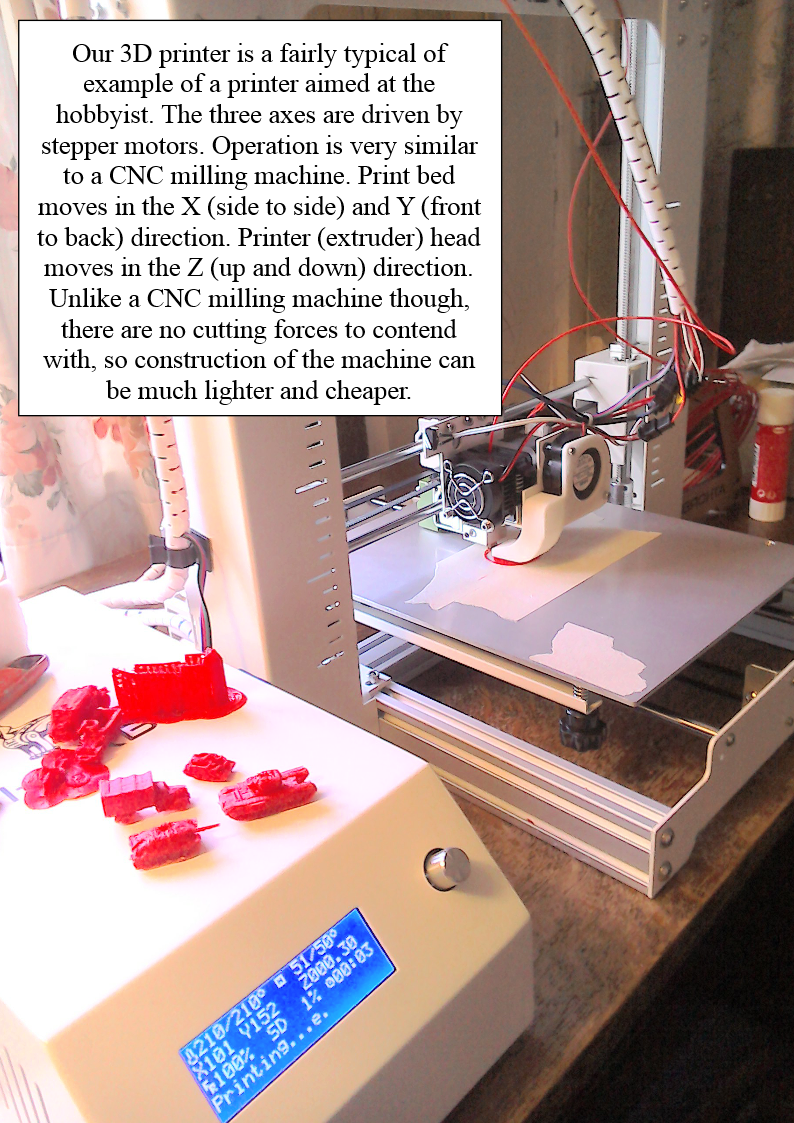
Athorbot 3D Printer
Printing first layers of a 3D print
3D Printing - What is it?
 3D printing produces a solid, three dimensional object by building (or printing) it in a series of layers, one on top of the other.

How does it do this?
 Well, first you need a 3D CAD model of the object you want to print. You can either draw this or scan an existing object. 
   Next, you’ll need some clever software to convert this model into slices and generate the code required to control the printer’s movement. 
    Finally you will of course need a 3D printer. There are currently three main 3D printing processes in use: Stereolithography (SLA), Selective Layer Sintering (SLS) and Fused Deposition Modelling (FDM). By far the most popular method for DIY/ hobbyist use is FDM.

Fused Deposition Modeling - that sounds rather complicated!
 It’s a posh term for squeezing (extruding) hot plastic through a tiny nozzle and using it as the ‘Ink’ to draw a layer of the object. The nozzle is then moved up very slightly and another layer printed on top of the first. Repeat this process until the whole object is printed.
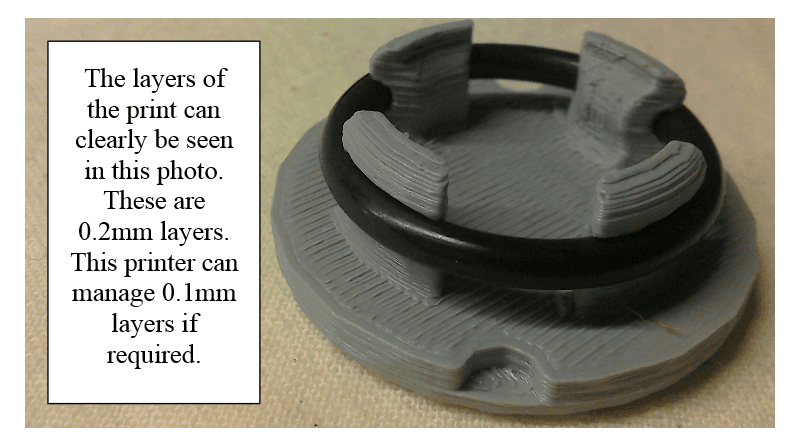
  The smaller each layer’s thickness is, the better the quality of the finished print.
3D printed 'bung'
  So, is it a tool that no shed/ garage should be without? Well, that depends. In this case, I could have made this bung on the lathe. But if you haven’t got a lathe, then the printer provides an alternative. Also I’ve only been playing with this one for a week or so, so I can’t really answer that yet. I have a few ideas for where the printer could come in useful, even if it’s only for prototyping the size and shape of a part before it is manufactured by more conventional means. Time will tell, but until then here are a few pros and cons to think about


Pros…


 Smaller and (possibly) cheaper and lighter than a lathe or milling machine. Great if you don’t have much space.

 Although you shouldn’t leave it running unattended, you can be doing something else while you mind it.

 You can produce shapes and features that would be difficult to machine conventionally.

Cons…


 Steep learning curve. There are numerous settings and parameters which all have a bearing on the quality of your print.

 Materials available for DIY use printers restrict it to non-structural parts.

 If you want to make parts of your own design, you need to be able to access and use 3D CAD.

  More on 3D printing can be found in Issue 6 of the magazine and in the resources section of the website.

Share by: